Why Prep Work Is the Most Important Part of Painting
It’s easy to assume that a good paint job is all about color or technique. But any experienced painter will tell you the truth: 70% of a flawless finish comes from what happens before the brush even touches the wall.
Prep work is the not-so-glamorous foundation of every successful painting project. Without it, even high-end paint won’t perform the way it should. If your walls start peeling, streaking, or looking uneven within a year, poor prep is likely the reason why.
In this guide, we’ll explore:
- What prep work really involves
- Why it’s essential for durability and appearance
- Common issues caused by skipping it
- The tools and time it takes to do it right
- How to know if a job was properly prepped
What Is Paint Prep Work?
Prep work is the set of tasks performed before painting begins. It includes:
- Cleaning: Removing dust, oil, and grime from surfaces so paint can adhere properly
- Sanding: Smoothing rough spots and removing gloss from surfaces to allow paint to grip
- Patching: Filling nail holes, dents, and cracks with spackle or filler
- Priming: Applying an undercoat to ensure even color and better adhesion
- Masking and taping: Protecting floors, fixtures, trim, and furniture from overspray or drips
Good prep turns rough, dirty, or glossy surfaces into a perfect canvas. Without it, the best paint in the world can’t do its job.
Why Skipping Prep Leads to Problems
Prep work isn’t just a formality—it directly affects how long your paint lasts and how good it looks. Skipping or rushing it can lead to:
- Peeling or flaking paint due to poor adhesion
- Visible imperfections like cracks or nail holes that show through
- Uneven texture or blotchy color because of unprimed or patched areas
- Streaks and roller marks that could have been avoided with proper surface smoothing
- Premature failure of the paint job, requiring a full repaint much sooner than expected
In short, skipping prep work to save time or money usually ends up costing you more.
Interior vs. Exterior Prep: What’s the Difference?
While the principles of prep work are consistent, there are a few important distinctions between interior and exterior projects.
Interior Painting Prep:
- Wipe down all surfaces to remove dust, cobwebs, and oils
- Patch holes from nails or wall anchors
- Sand patched areas and glossy walls for better adhesion
- Apply painter’s tape to trim, baseboards, and ceiling lines
- Prime problem areas (stains, water marks, dark colors)
Exterior Painting Prep:
- Power wash siding to remove dirt, mildew, and loose paint
- Scrape any peeling paint
- Sand rough edges for a smooth transition between old and new
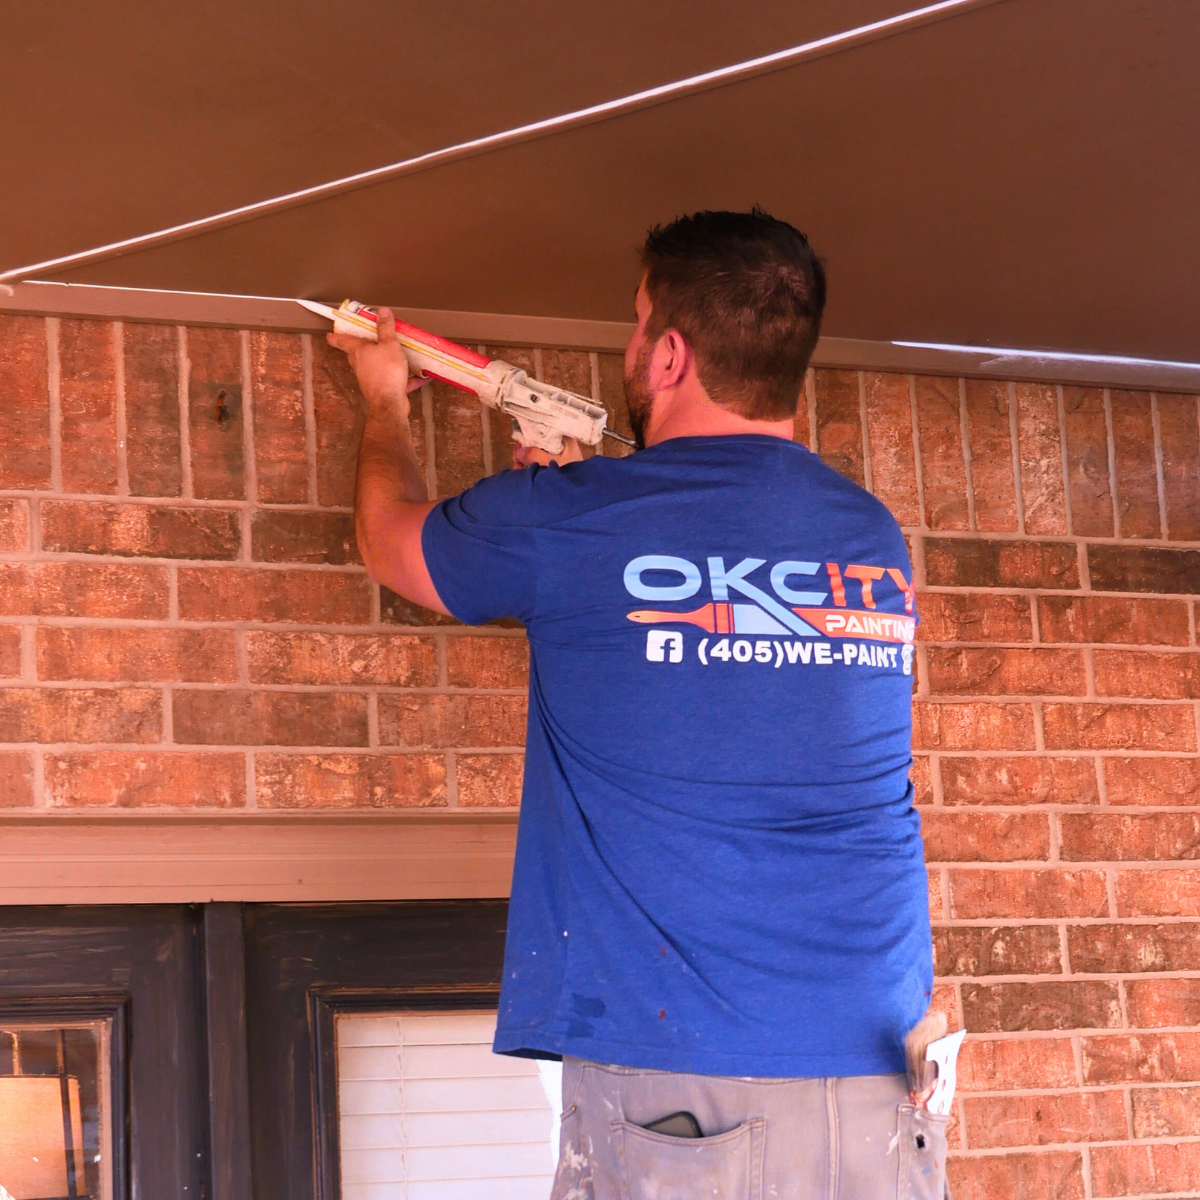
- Fill gaps with paintable caulk to prevent water intrusion
- Use exterior-grade primer on exposed wood or bare surfaces
How the Pros Prep—and Why It Matters
A professional painter knows that prep can take as long (or longer) than the actual painting. That’s because they focus on doing it right, not just doing it fast.
What professionals typically do:
- Use power sanders to save time and ensure even surfaces
- Select specialty primers tailored to the surface type and paint formula
- Apply caulk cleanly to close gaps around trim, windows, and doors
- Protect surrounding areas with drop cloths, plastic sheeting, and high-quality painter’s tape
- Identify problem spots (like moisture damage or mildew) before painting
The result? A paint job that looks better, lasts longer, and holds up to daily wear and tear.
Time Investment: What to Expect
If you’re prepping a single room, here’s a general timeline for solid prep work:
- Cleaning: 30–45 minutes
- Patching and sanding: 1–2 hours
- Masking/taping: 1 hour
- Priming: 1–2 hours (plus dry time)
For an exterior, especially one with peeling paint or wood rot, prep could take several days—especially if you’re scraping, caulking, or replacing damaged boards.
Bottom line: prep work takes time. But that investment pays off in the form of fewer touch-ups, better coverage, and longer-lasting results.
Tools That Make a Difference
Prep work isn’t just about elbow grease—it’s also about having the right tools for the job.
Essential prep tools:
- Sanding blocks or orbital sanders
- Spackle and putty knives
- Utility knife for detail work
- Painter’s tape and masking film
- High-bonding primer
- Caulk and caulking gun
- Cleaning cloths or degreaser
You don’t need every tool for every project—but skipping the right one can show in the final result.
How to Tell If Prep Work Was Done Right
If you’re hiring a painter or inspecting work after the fact, here are signs that prep work was taken seriously:
Walls feel smooth with no raised patches or grit
Trim lines are clean and crisp, with no bleeding
Paint color is even and consistent across all surfaces
There are no signs of peeling or bubbling within the first year
High-traffic areas (doors, corners, cabinets) aren’t chipping prematurely
If everything looks great and still holds up after 6–12 months—that’s the mark of good prep.
In Conculsion…
Paint is only as strong as the surface beneath it. A flawless finish that lasts for years doesn’t start with the roller—it starts with the prep.
Whether you’re painting a single room or your entire home exterior, taking time to clean, sand, patch, and prime properly will make the difference between a quick fix and a lasting transformation.
So next time you’re tempted to jump straight to color, remember: the real work begins before the paint comes out.