
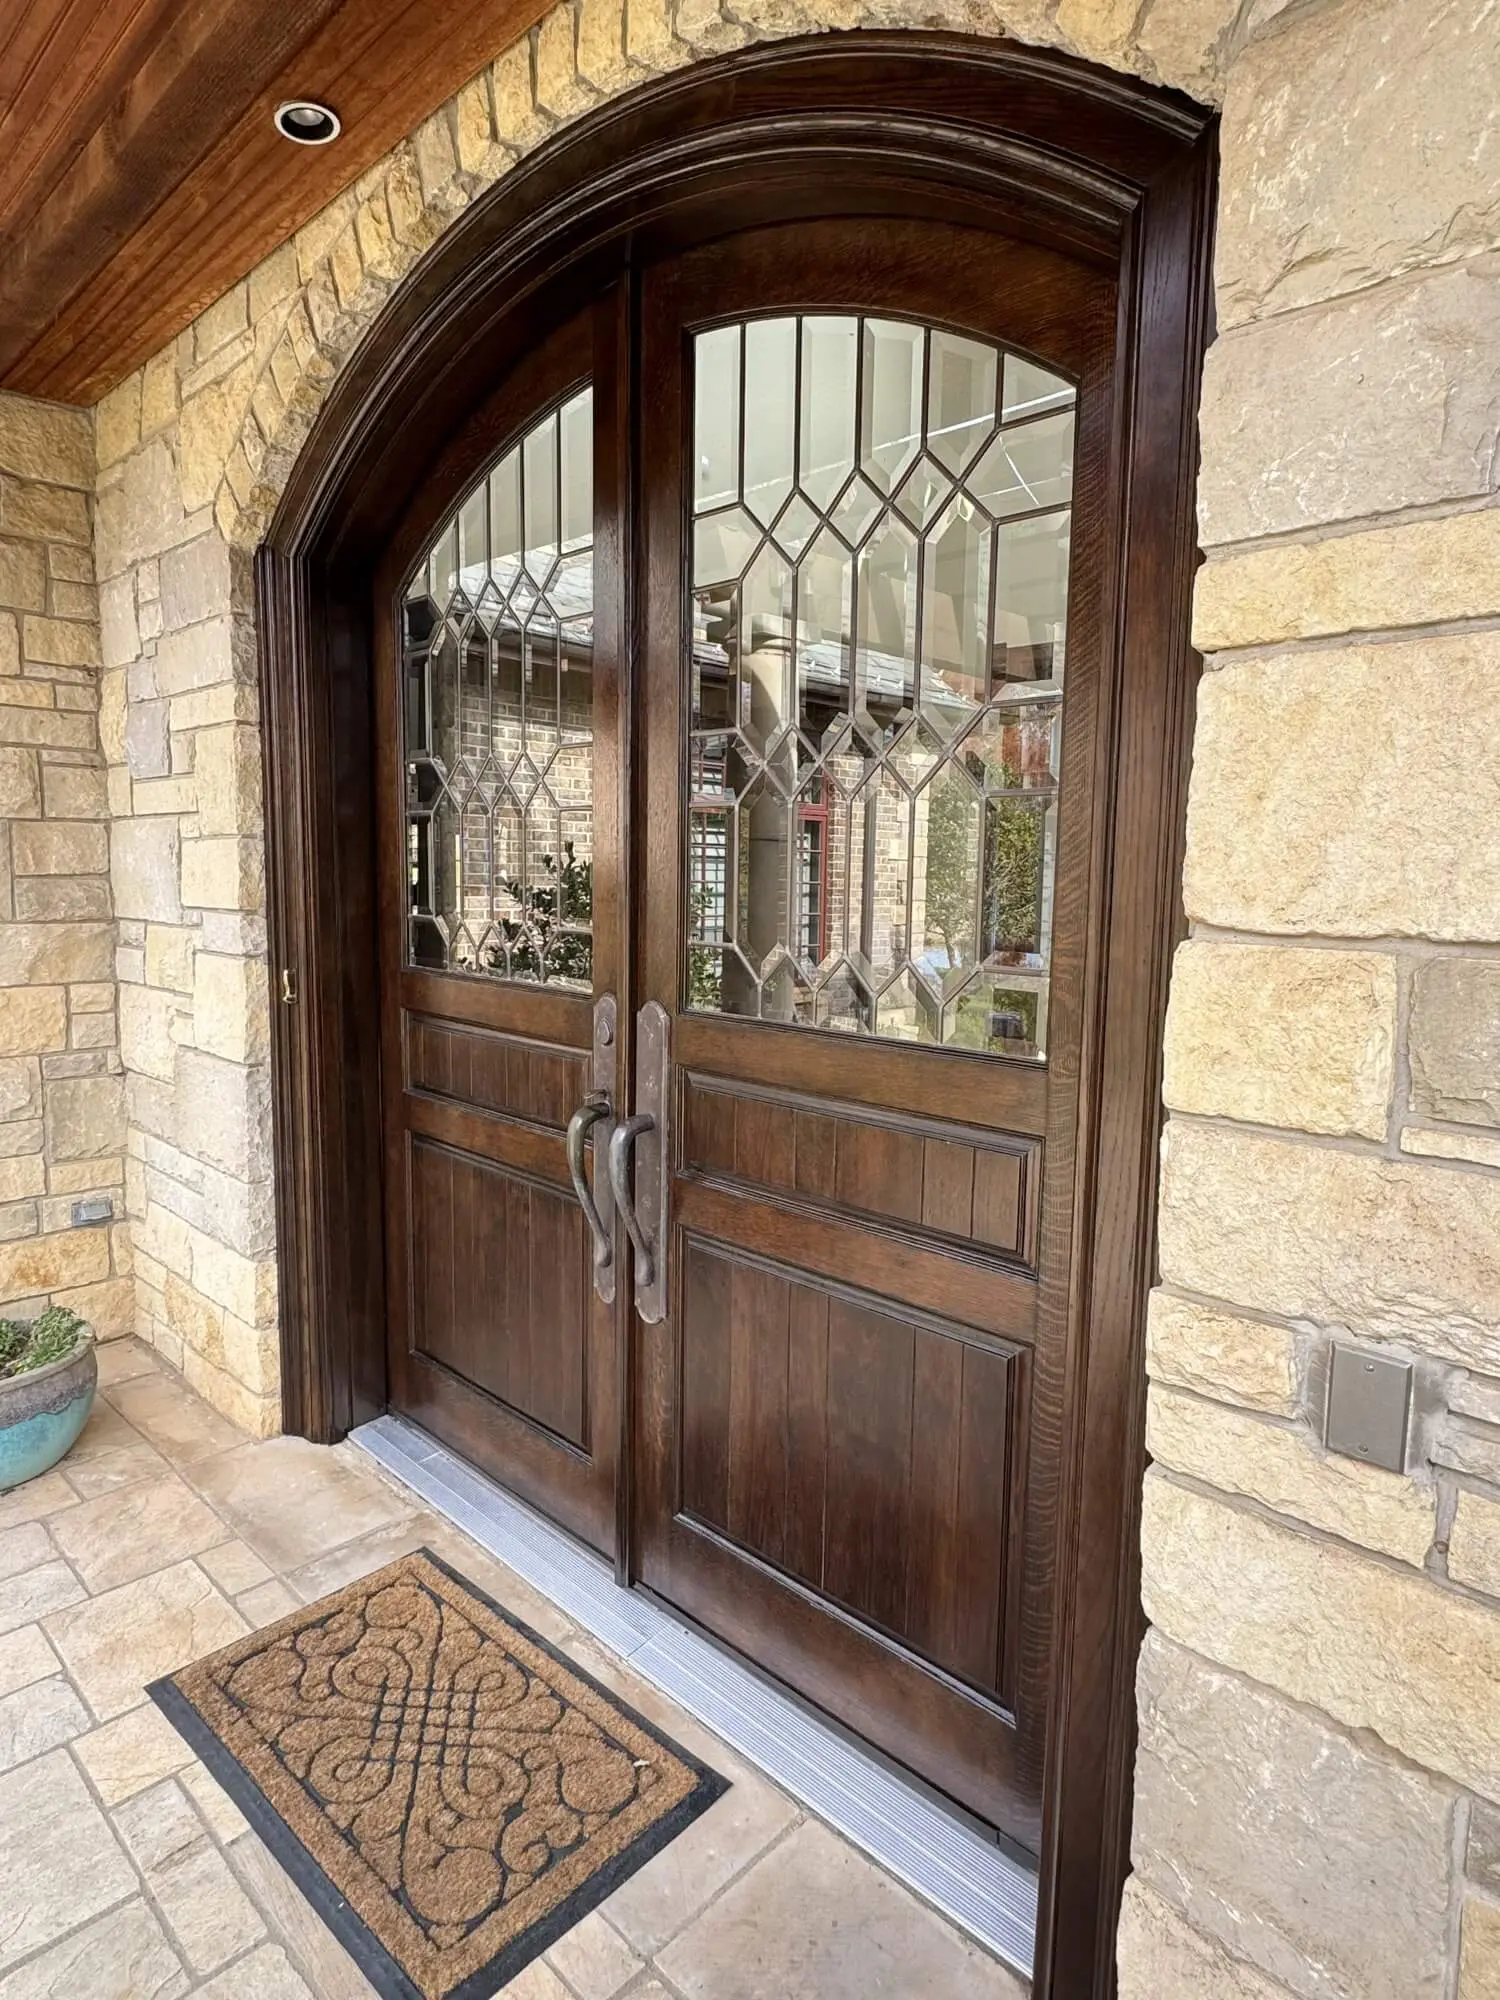
The Before
A west-facing front door in Oklahoma takes more abuse than any other surface on a house.
This one, a custom-made unit on a large horse ranch in north Edmond, sat in full afternoon sun through the kind of summer heat this state is known for. Day after day of direct exposure at the hottest hours, on the one part of the house that takes it head-on.
The existing finish had failed. Once a clear finish on exterior wood gives out, the wood underneath stops being protected, and water goes where the film used to keep it out.
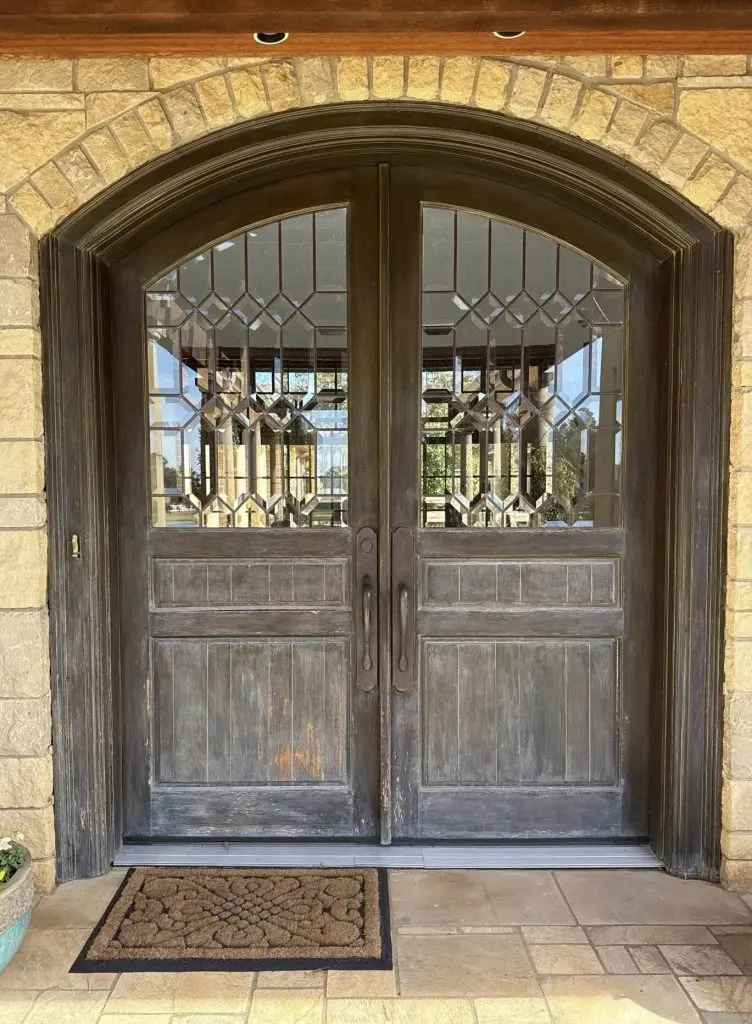
That's what happened here. The failure had progressed far enough to cause moderate rot in some areas of the door, along with damage to the trim.
A door at that stage is past the point of a touch-up. The finish wasn't thin, it was gone in places, and the wood had already started paying for it.
Finish failure on a door follows a predictable arc, and knowing it is what tells you when a refinish is still a refinish and not a replacement.
A clear exterior coating does two jobs. It blocks water, and it blocks UV. The UV part is the one that goes first, because sunlight breaks down the film from the top surface down. As that happens the coating loses its grip and starts to cloud, flake, and lift away from the wood in sheets. Anywhere it lifts, water has a path, and wood that stays wet long enough is wood that starts to rot.
West exposure accelerates every step of that. Morning sun comes in at a low angle with less intensity behind it. Afternoon sun in July and August comes in hot and stays on the surface for hours, and the heat matters as much as the light, since a dark door in direct sun runs far hotter than the air temperature around it. Wood expands under that heat, the finish on top of it moves differently, and the film that's supposed to be bonded to the wood starts working against it.
Doors also get judged differently than the rest of a house. Siding that has faded a shade reads as weathered. A front door with a clouded, flaking finish reads as neglected, because it sits at eye level, it's the one surface every guest touches, and it's framed by whatever stone or brick surrounds it. On a custom unit, that contrast is sharper still, since the door was chosen to be looked at.
So the condition of this door wasn't a maintenance miss. It's what a west-facing exterior door does on the schedule Oklahoma sets for it, once the finish has gone past its service life without being renewed.
The Problem
The door needed a full refinish, not a recoat, and that distinction drove every decision on the project.
Three things made it more involved than a standard refinish.
The old finish had to come off completely
A failed clear coat can't be coated over. Any new finish applied on top bonds to a film that's already releasing from the wood, so the new work fails on the schedule the old work set. Stripping back to raw wood is the only way to start from a surface that will hold, and that's slow, careful work rather than a quick sanding pass.
Rot repair under a transparent finish has nowhere to hide
On a painted surface, filler disappears under an opaque coat. Under stain and clear, every repair stays visible, because a transparent finish shows what's beneath it rather than covering it. The putty has to match the surrounding wood in color and take stain in a way that reads as part of the door, which is why color-matched material was used instead of a general-purpose filler.
The exposure that caused the problem wasn't going away
Refinishing a west-facing door in Oklahoma and expecting a standard clear coat to hold is how a door ends up back in the same condition. The new finish had to be specified for that exposure, with enough film built up to carry the UV load for years rather than seasons.
The Solution
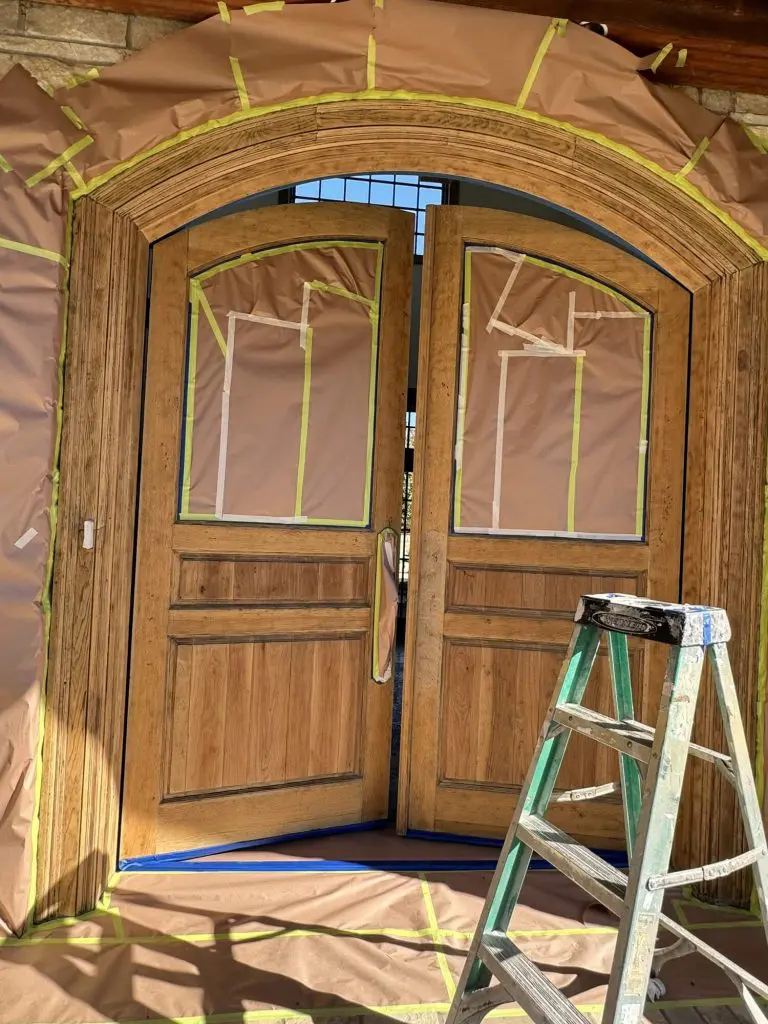
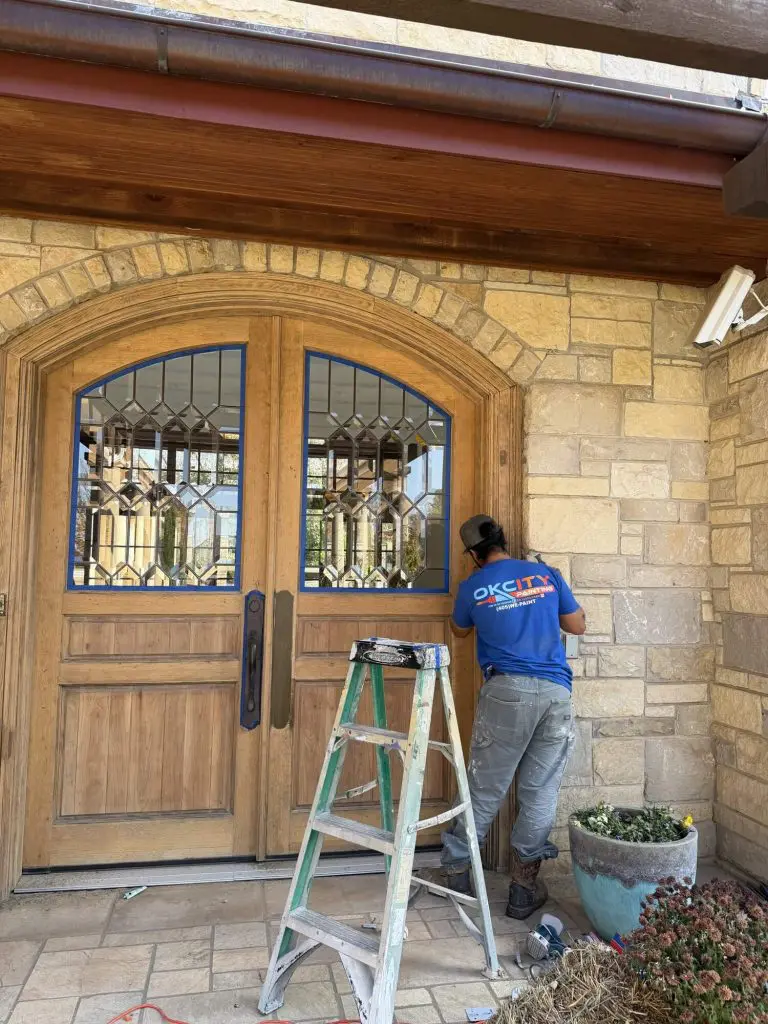
The door was fully stripped of all finish and color, down to raw wood. Everything that followed depended on that step being done completely.
The full scope:
- Stripped the door completely of existing finish and color, back to bare wood
- Repaired the areas of rot with color-matched putty
- Repaired the damaged areas of trim
- Re-stained the door in Gemini stain, color Tobacco
- Applied 4 coats of PPG ProLuxe Door & Window clearcoat
Stripping to raw wood does something besides removing the old coating. It resets the color. Taking everything off gives the new stain one uniform surface to work on, so the color lands evenly across every part of the door.
The rot repair came next, before any color went on. Color-matched putty fills the damage with material close enough in tone to the surrounding wood that it reads as grain rather than as a patch once the stain and clear go over it. The trim repairs were handled the same way, since trim that's been damaged next to a freshly refinished door draws the eye straight to itself.
Gemini stain in Tobacco set the color. A warm mid-tone like that does a particular thing on a door: it's deep enough to look rich and finished, and it reads as intentional against stone and brick rather than disappearing into them.
Then came the part that determines how long all of it lasts. Four coats of PPG ProLuxe Door & Window went over the stain, which is a finish made specifically for exterior doors and windows rather than a general-purpose clear. Coat count matters here more than most people expect. Each additional coat builds film thickness, and film thickness is the material standing between afternoon sun and the wood. A thin finish on a west-facing door is a finish on a short clock, no matter how good the product is. Four coats is what buys the years.
Sequencing is most of what makes five days the right number rather than two. Stripping has to be finished and the surface fully dry before any filler goes in. Filler has to cure before it gets sanded flush, and sanding has to be done before stain, since stain lands differently on raw wood than on anything sitting proud of it. Only then does the color go on, and only after the color has set do the clear coats start. Compressing any of those windows shows up in the finished film, usually months later.
Five days, start to finish, with the stripping, repairs, staining, and four separate coats all needing their own time in sequence. A door like this can't be rushed through coats, because each one has to be fully set before the next goes on or the whole film suffers for it.
Before & After
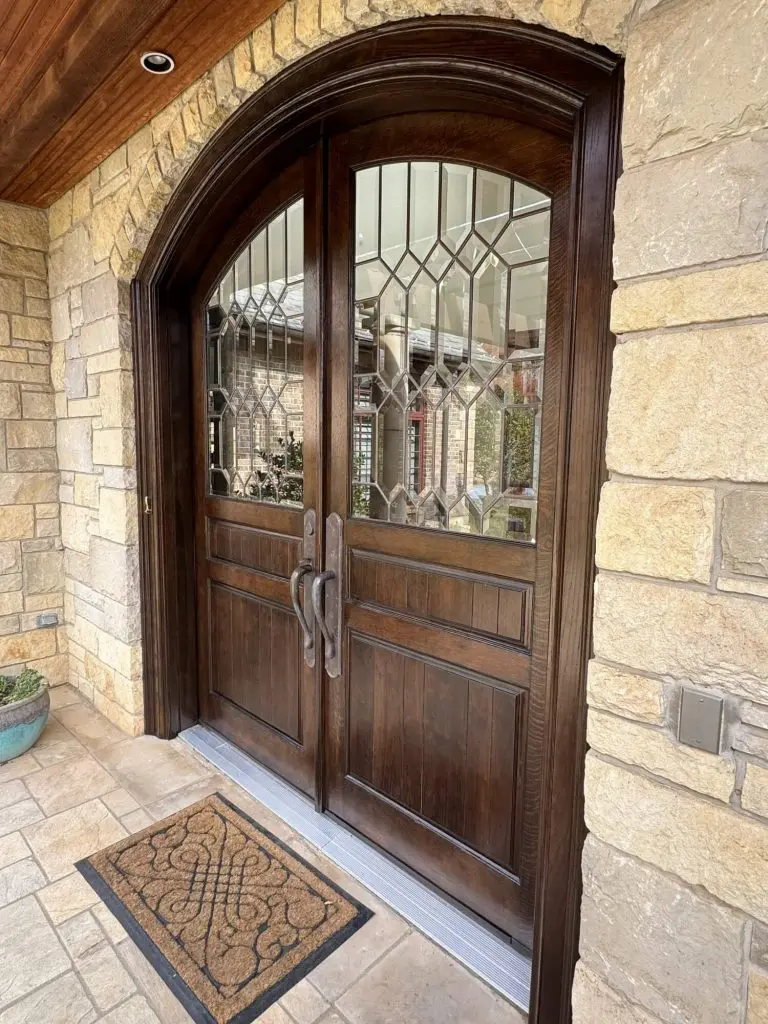
The After
The door came back looking like the custom unit it is.
Tobacco over bare, evenly prepped wood gives a deep, warm tone with the grain reading clearly through it, and the four coats of clear bring a finish that sits even across the whole surface. The repaired areas blend into the door rather than announcing themselves, which is the whole test on a transparent finish.
The best measure of this one came after the fact. The homeowner was happy enough with the result that she brought OKCity Painting back to refinish a door at another of her properties.
Repeat work on a second property is a different kind of endorsement than a review. Anyone can be pleased on delivery day.
Looking ahead, a refinished door stays in good shape far longer with light attention than it does without. Look at the finish once a year, particularly on the sun-facing side, and watch for any dulling, clouding, or spots where the film looks like it's losing its hold. Catching it at that stage means a maintenance recoat, which is a short job. Letting it run until the film is gone means stripping back to raw wood again, plus whatever repairs the exposed wood needs by then. The difference in cost between those two paths is considerable, and it comes down to noticing early.
If your front door is clouding, flaking, or showing bare wood anywhere, you'll get a straight assessment: maintenance recoat or full refinish, plus an honest answer about any wood damage underneath. Call (405) 937-2468 or request a free quote, and the OKCity Painting team will come take a look.
What Our Client Said
Wow, it's looking awesome… And your guys are super nice too.